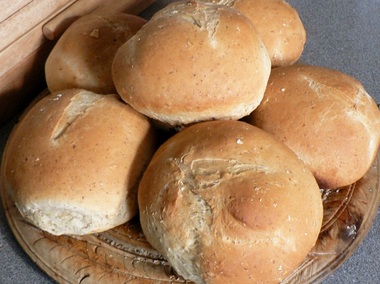
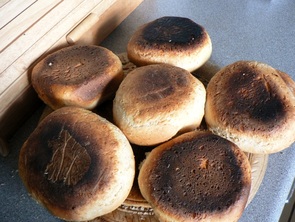
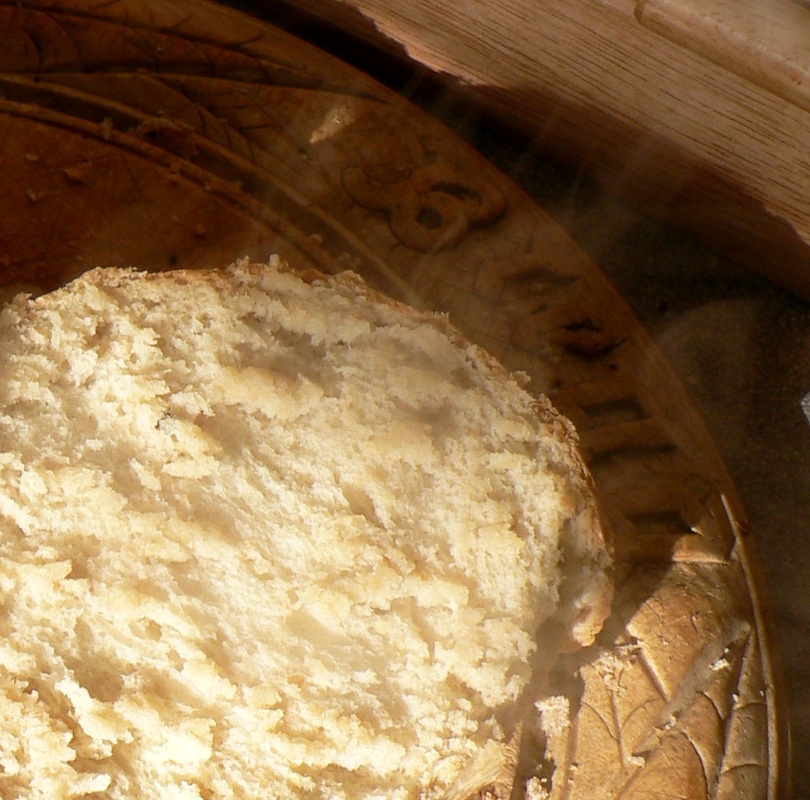
 Today I baked my first ever bread rolls after being inspired by a friend.
The recipe called for 650g of strong white flour, I used 620g strong white flour, 20g milled linseed and 10g rolled oats to add a bit of wholesome flavour. I used sunflower oil, but next time I'll try melting butter instead.
I'm really happy with how these have come out - they are more than edible!
Just watch out for the burnt parchment paper on the base... any advice anyone?
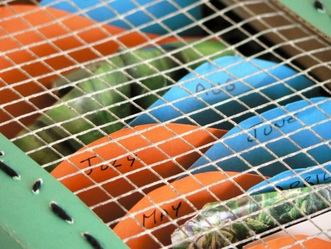
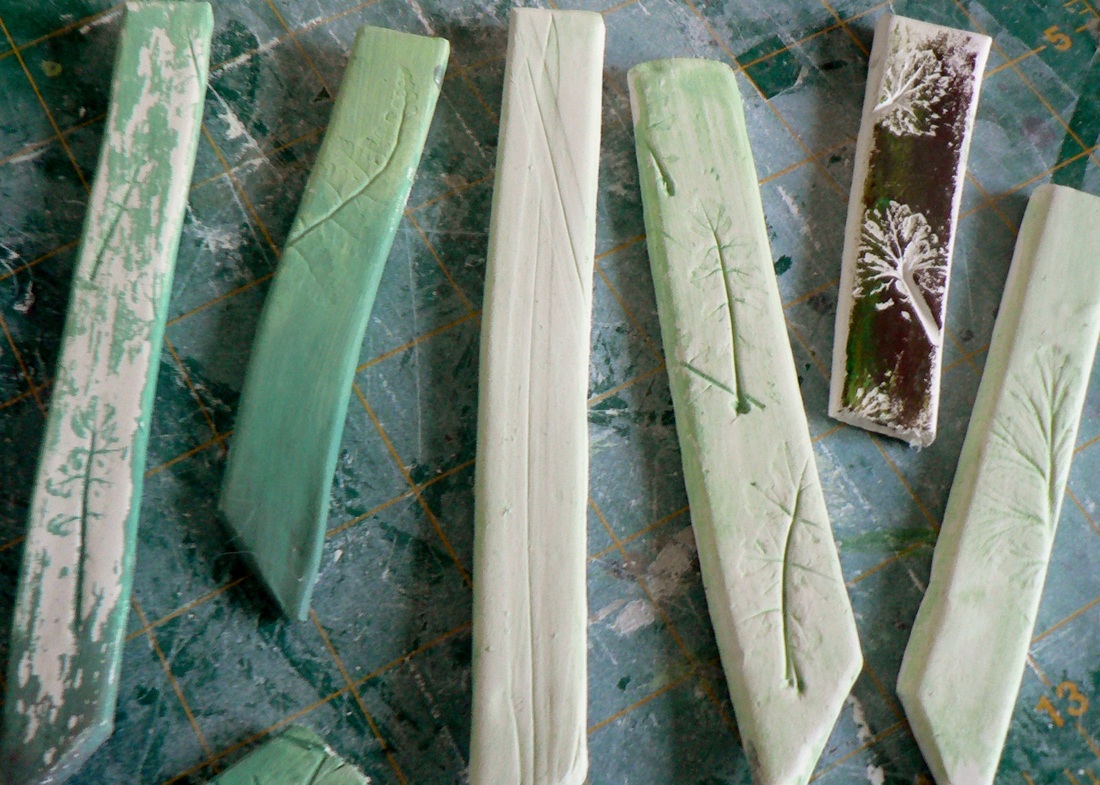
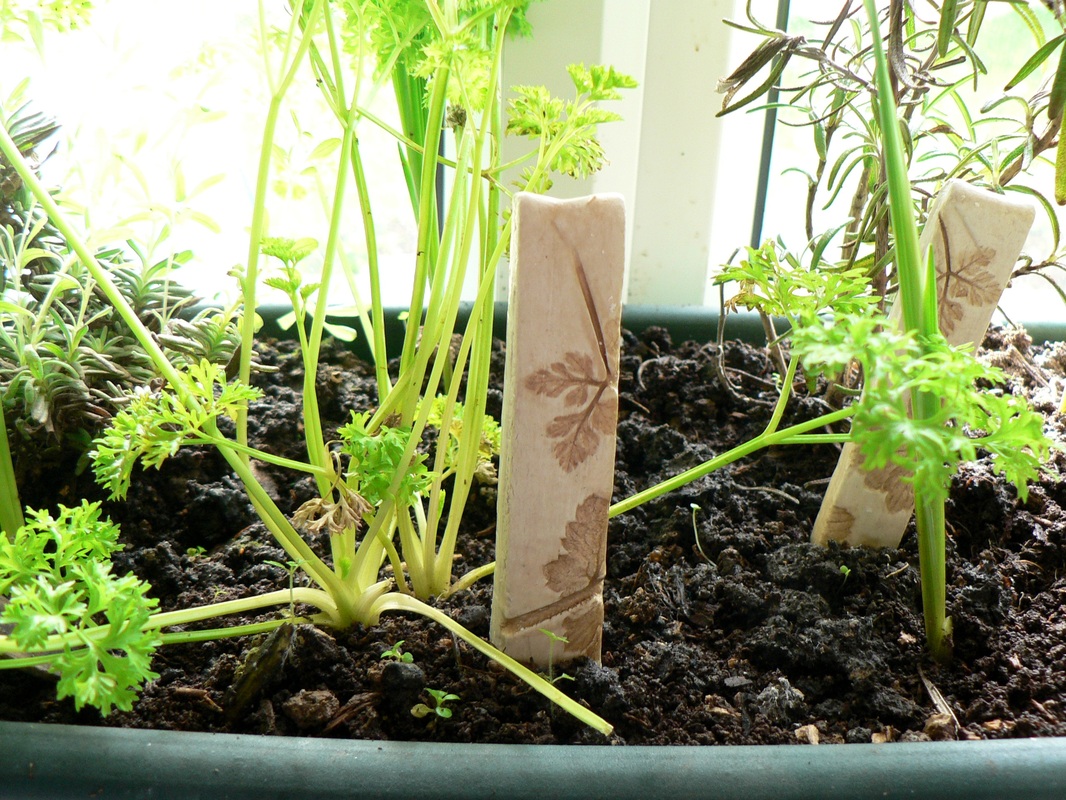
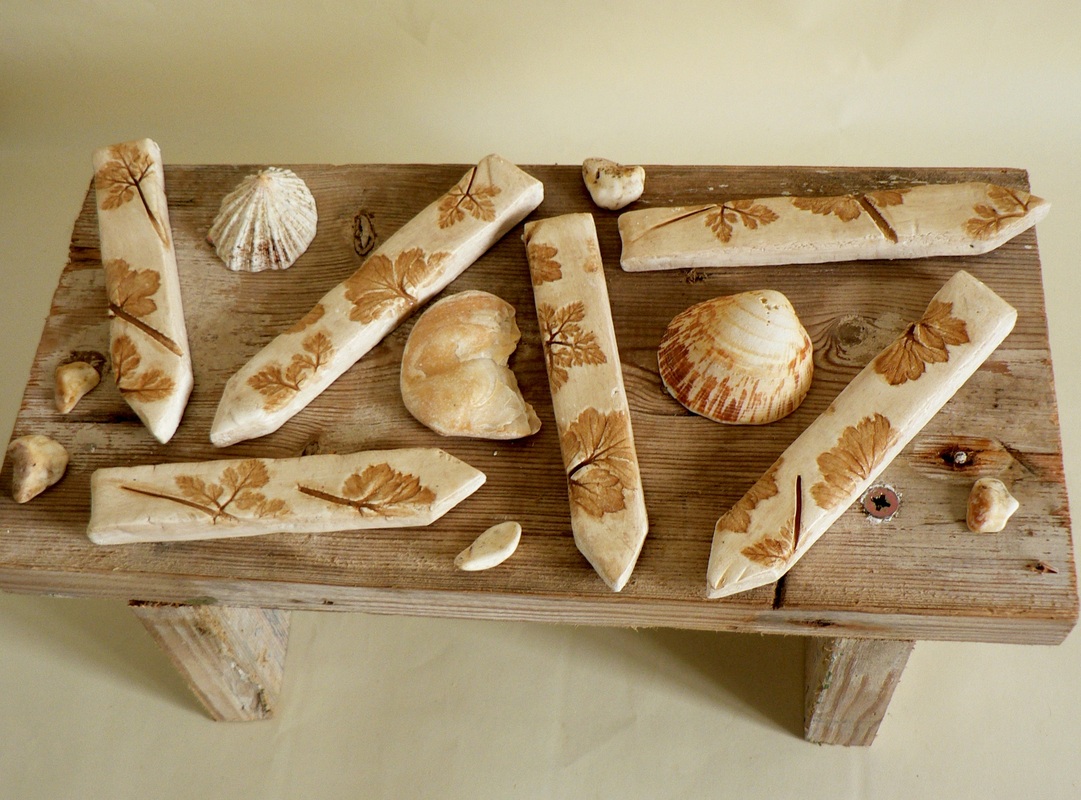
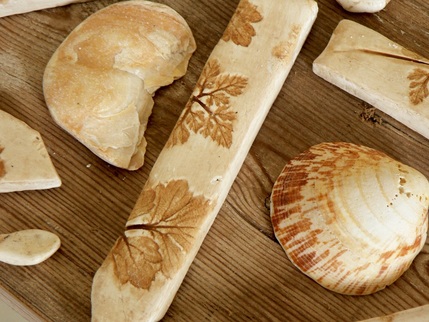 Feeling inspired by my garden sprouting into life, I decided to use some stashed modelling clay to mark out which herb is which on my kitchen windowsill. This has been mostly guesswork.. so lets hope I got the names right!
I ended up with some beautiful markers which I'm very proud of, using clay, a teabag, PVA glue, and a lot of patience!
| Step 0: Try out a bunch of different techniques and ideas.. you can see here I was aiming for a natural aged effect for the markers. Experimentation taught me two key things:
1) Thin clay snaps quickly
2) Water down your colours to enable you to wipe away excess completely.
3) If you are aiming for an old effect, acrylic is NOT the medium to use.
| | I decided to wing it with thicker markers, intricate leaves, and to stain my markers using concentrated tea.
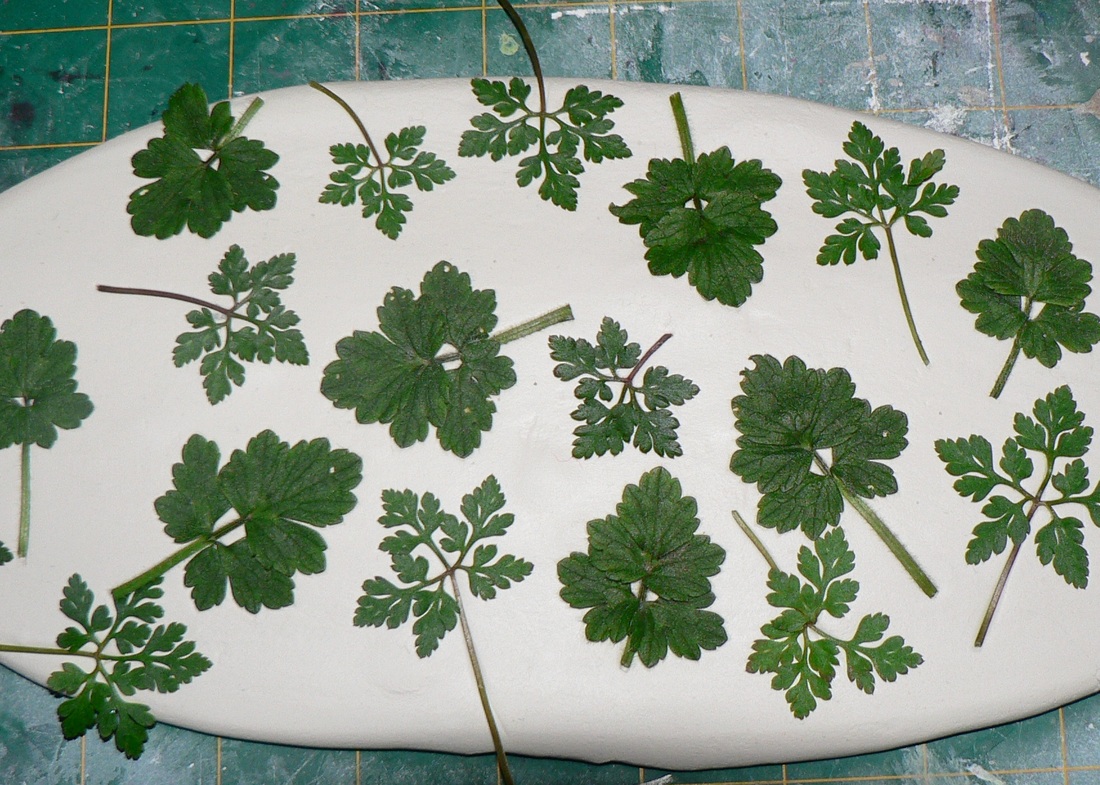
Step 1: Roll the clay out much thicker than you want it. Place fresh leaves onto the clay and roll again to press them into the surface
|

Step 2: Cut the clay using a ruler into the basic size you want. Carefully remove the leaves.
| Step 3: Leave to dry. Do not touch for 24 hours. Also - leave on a smooth surface, or the backs will become imprinted too.
Step 4: Smooth off the rough sides very gently - the clay will still be a bit moist at this point. I used an old scalpel blade.
Step 5: After a further 24 hours you are ready to paint the markers. Boil water and soak a teabag in a little water - just enough to paint the markers. I went all over the markers once, and then concentrated painting tea into just the imprints for another 4-5 times.
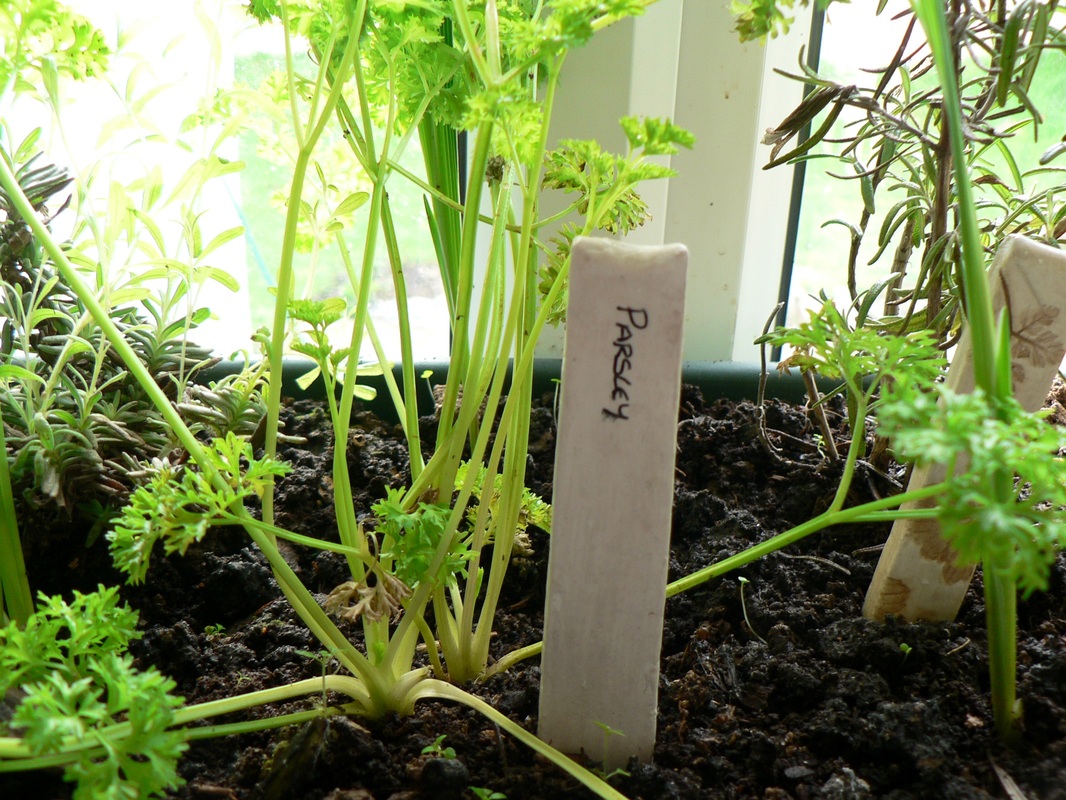
Step 6: You guessed it, wait another day. The markers will be dry now, and can be painted with PVA glue or varnish to seal them. I then wrote the names of my plants on the back - here is Parsley's marker in action And that's all there is to it!
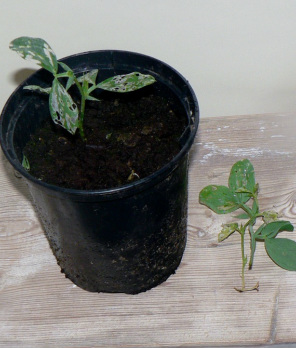
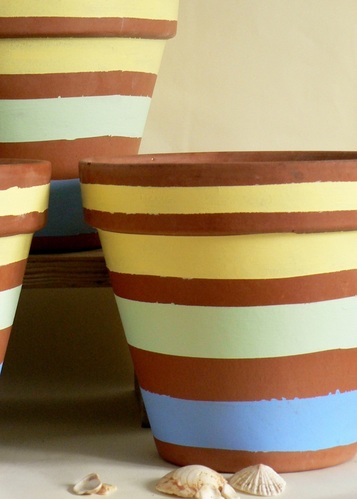 I've been feeling really under the weather so picked a quick craft to cheer me up! I masking taped up stripes on 3 terracotta pots, and used old wall paint to brighten them.. I wasn't too concerned with a perfect finish, since nothing seems to last too long in the garden!
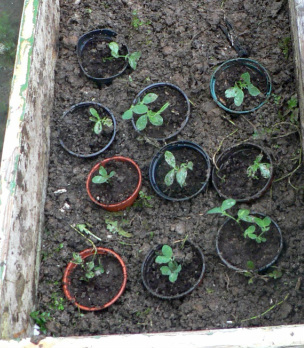
These will be planted up in March with my sweet pea seedlings, which I have just cut back to encourage growth; especially important since they aren't looking too healthy.
I've also taken some advice from my Reader's Digest "Gardening Year" and moved my cold frame onto the soil. This way I was able to "plunge pots up to their rims in peat" - well, almost!
Do you have any more ideas for how to liven up my peas?
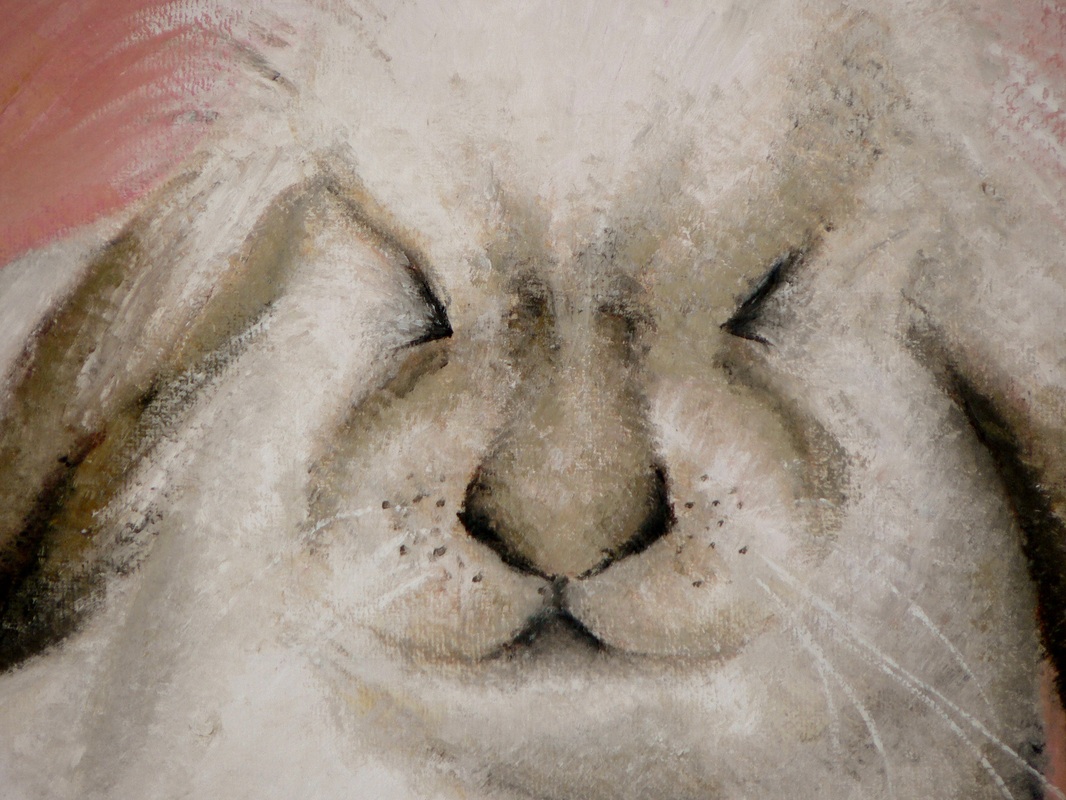
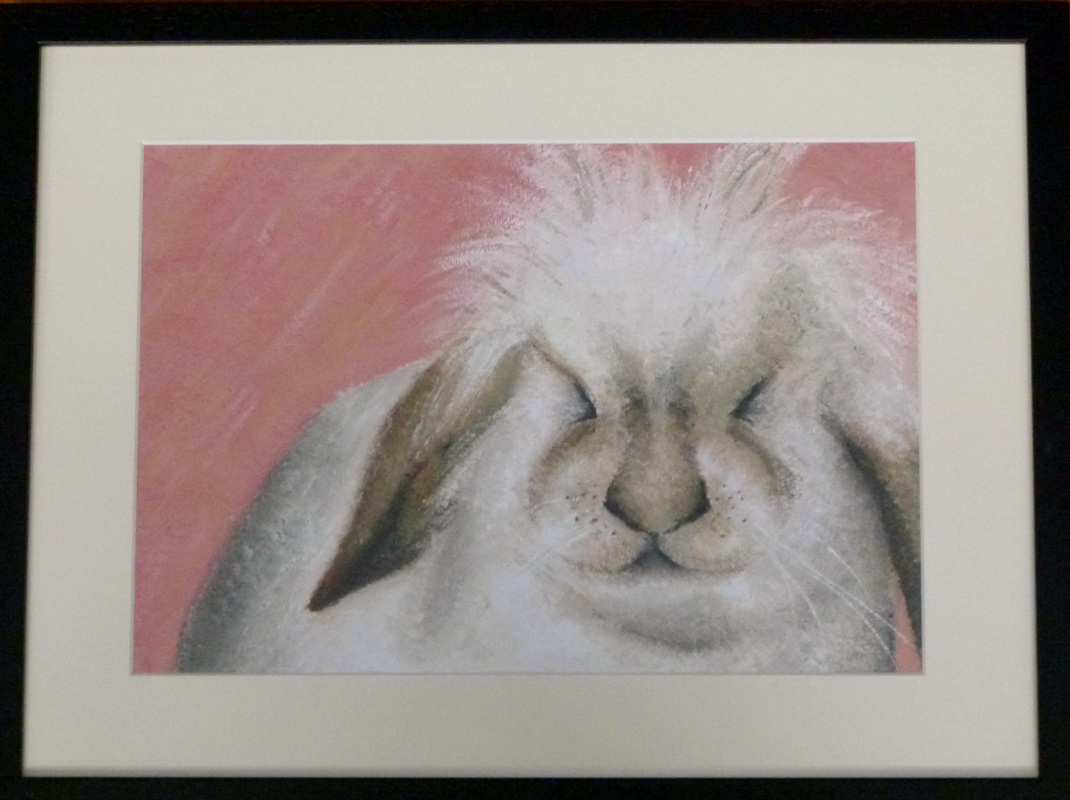
With my beautiful sister's birthday coming up I knew I had to get my craft on to celebrate. I painted her rabbit for her, and here's the finished thing :) I was pretty happy with it since it's the first time I've painted in a year, and the second time since leaving my GCSEs 8 years ago. I'm starting to think this is something I would like to develop.
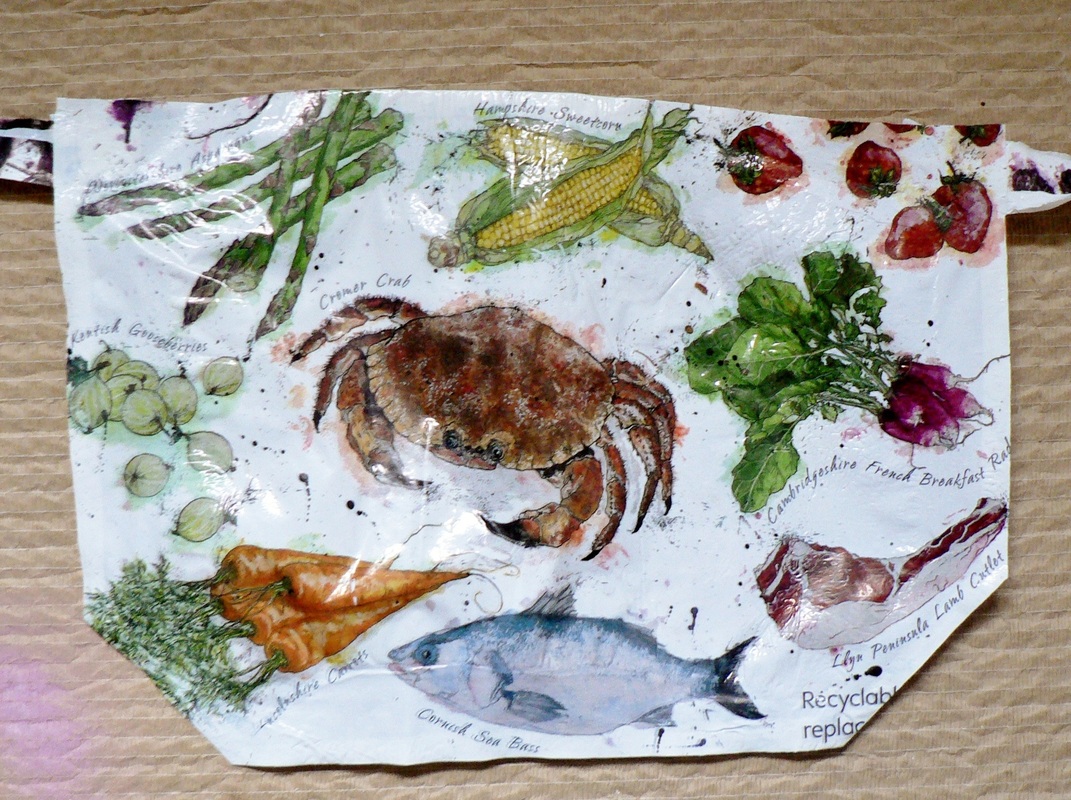
I got into Guides this week to find the girls getting out recycled bags to fuse together into new objects - Although I was busy helping everyone with their designs, I managed to steal away a Waitrose bag to turn into an apron once I got back home :) The best thing about working with plastic is that you can just iron down the seams, no stitches required!
 January always feels like the perfect time for a spring clean. And perhaps it is - you still have time thanks to the holidays and you also have the resolution for it - "This year will be better/cleaner/happier/more organised". So we moved the rooms round, the dining room gained a snug area with sofa and bookcase, the living room took in the array of instruments we have, leaving the well lit (but small) music room for me to move my craft into. The craft room? Its now a laundry/office/spare room - clearing all our clutter away for now :)
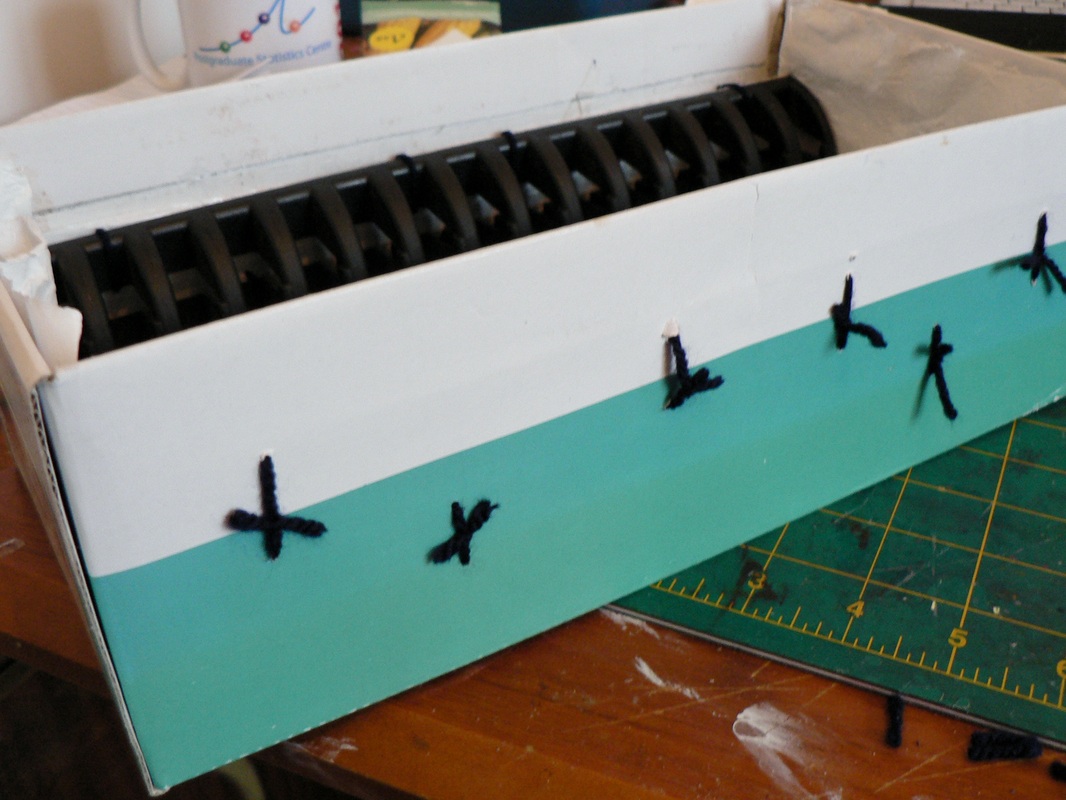
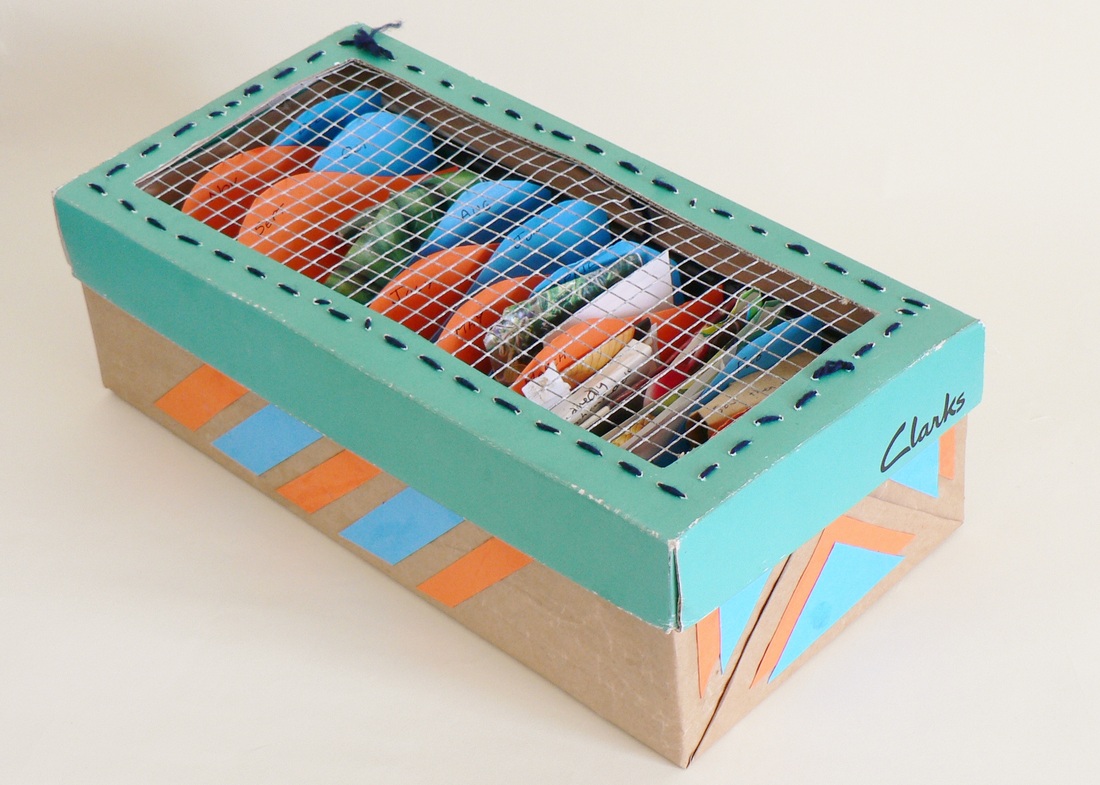
The upshot of all this is I ended up dismantling the top part of our office desk - complete with redundant CD rack. When I carefully placed (read: threw) these into the utility room they landed next to my disgusting shoe "seed store" - and a quick eyeball told me that they would fit inside perfectly. Goodbye old icky seed tray I don't want to look inside, hello garden inspiration...
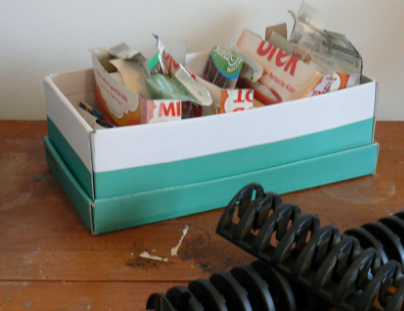
Yeah, that's right - ready brek dividers - based on what the seed was not when to plant it.
|
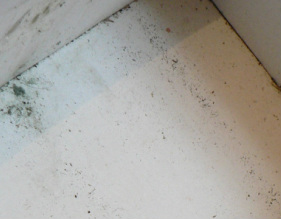
The mould I found after taking out the seeds and dividers
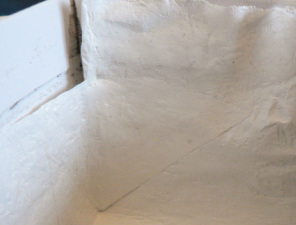
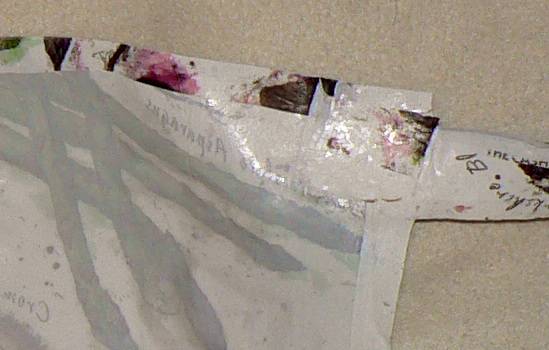
| My first instinct was to chuck the shoebox entirely - it went mouldy! But, it was the only thing in the house into which the cd racks fit exactly, so I worked around this by fitting in a plastic lining made out of old shopping bags. I'll explain more about this another time, for now - a quick google should find you a tutorial.
The no stitch plastic liner
|
All stitched in
| I stitched in the cd racks and plastic liner using thread I had bought for the garden notice board, and used my trusty (read: terrible) hot glue gun to finish off the seal round the edges of the liner.. I then used stashed card in bright colours to cut out dividers, and popped these into the cd rack - I left more space for busy planting months, like March, April and September. Cut the edges down so that the dividers are easily seen, cover with pretty paper and the left over card and you have and you're done :)
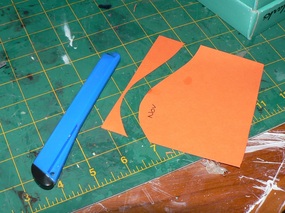
Cutting a curve into the months means they can be seen behind each other in the tray
|
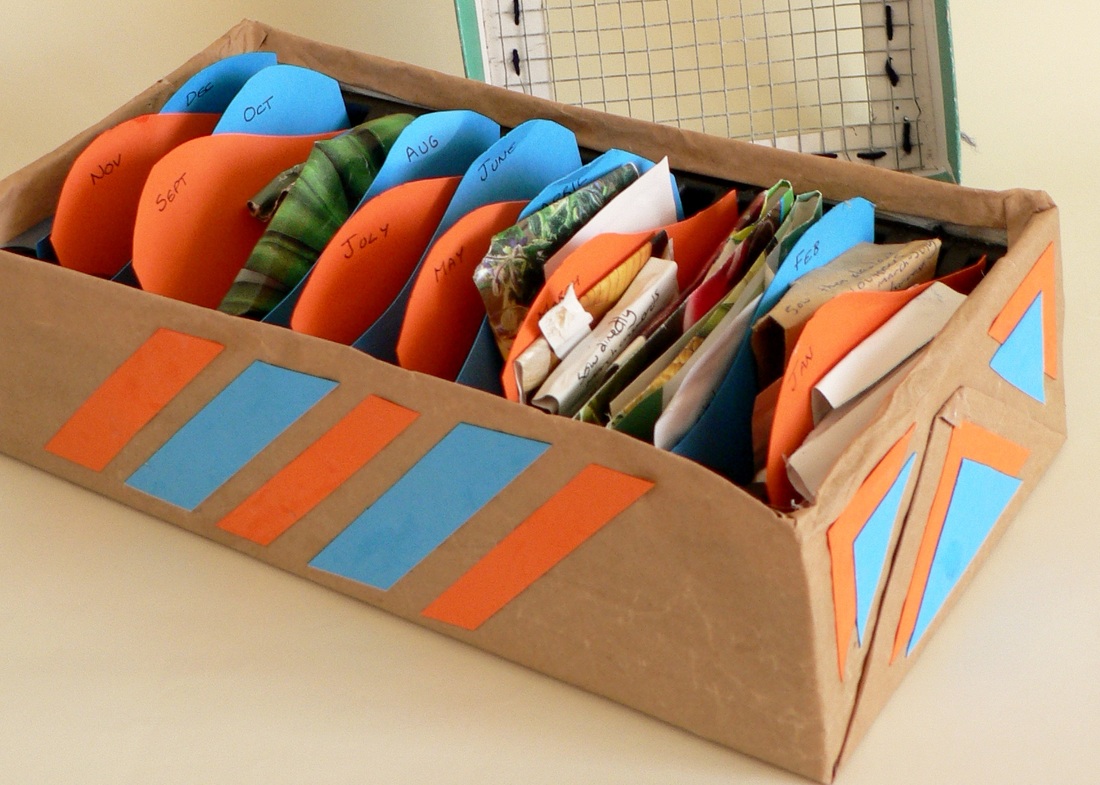
Finished seed sorter tray
| Or are you? What if you also saw some chicken wire the exact perfect size for a soil sieve? Wouldn't you make a multi-purpose lid?? I did! I measured out the chicken wire, cut out a slightly smaller rectangle (or I could have used triangles, circles - who knows) from the lid, and stitched in the wire. A project created entirely from stashed craft supplies - Do you like?
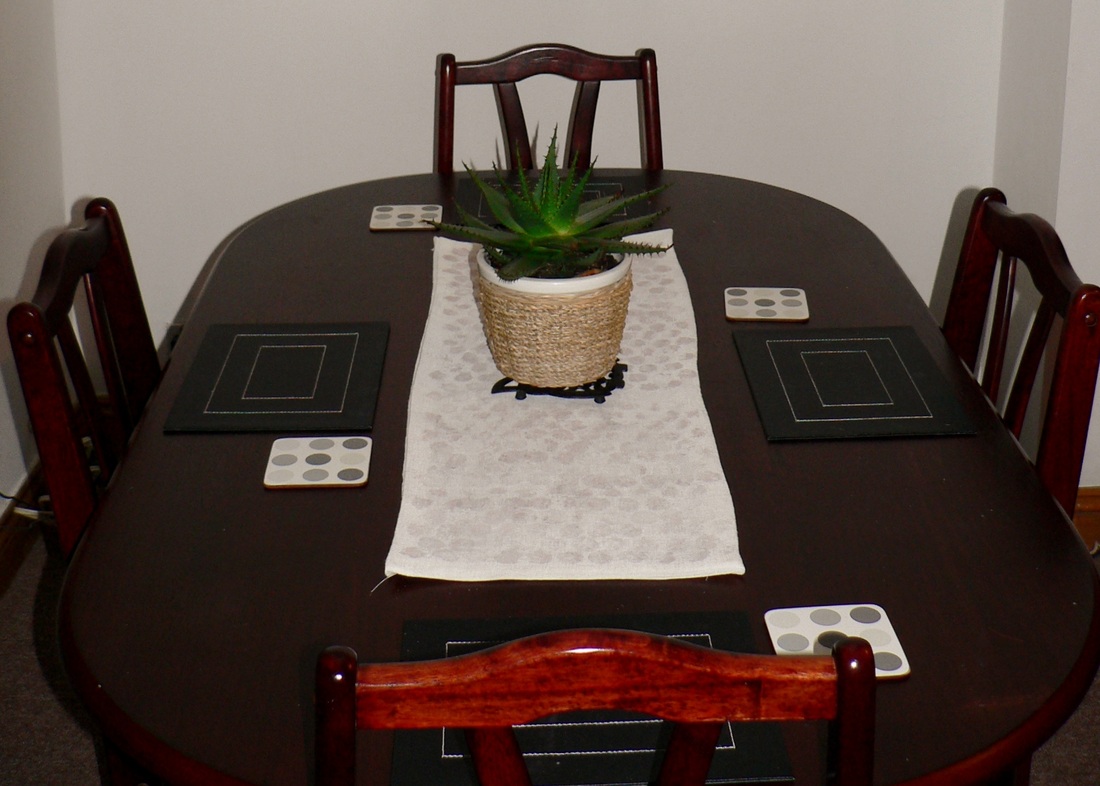
I got the coasters from a previous flatmate who was throwing them out - crazy person for ever throwing things out! And I feel that the runner now links them into the table, so I'm happy about that. It's a very masculine table as you can see
Here's a closer image of the final print:
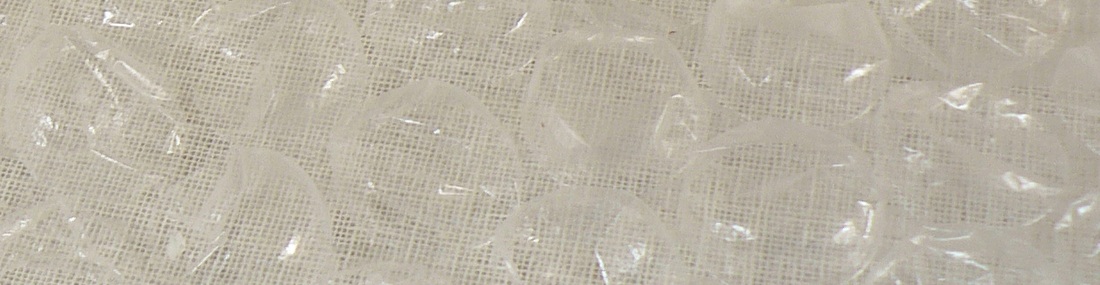
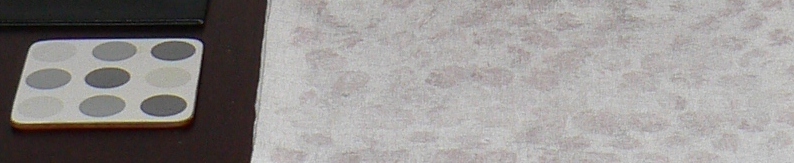
 Meet Mr. Spikey the house Cactus I made the runner from a sheet of fabric which is somewhere between jute and linen, artificially so I would guess - unless someone can tell me! I picked it up from a shop, knowing the texture was right but it was too plain on its own. I folded it over, and lacking a sewing machine I cheated with hemming tape. LimeRiot's design used fabric paint, and I think she got a really beautiful texture to her finished print. I used marbling inks I had lying around, because fabric paint was all the way at the shop and I already spent my craft budget on paintbrushes yesterday! Following the technique shared by LimeRiot I printed the tablecloth with the ink. The marbling ink worked well, but the circles were 1)too "wet looking" and 2) far too dark for my taste to begin with, so I washed out the majority of the paint before sealing it with another run of the iron.  Before I rinsed out the fabric I'm really happy with the end effect, it's more subtle. If there was a next time I think I would try to recreate the coaster design using fabric paints.
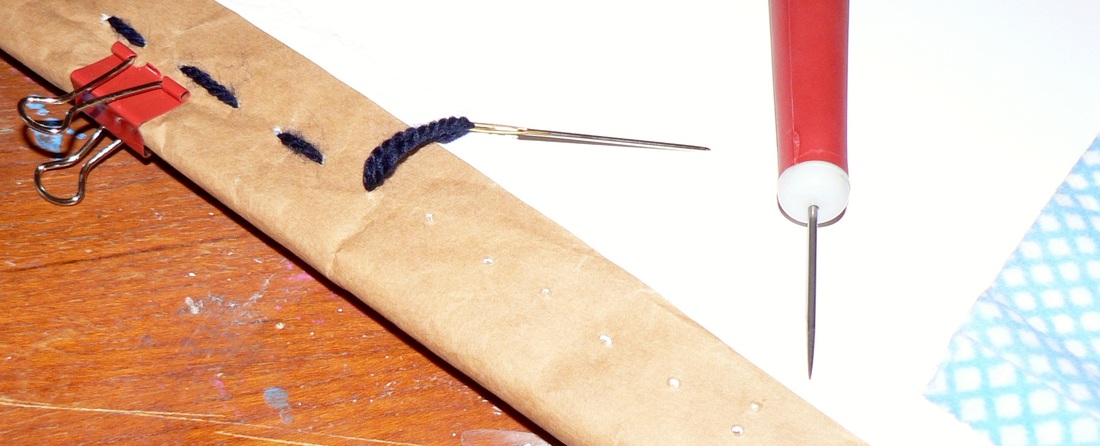
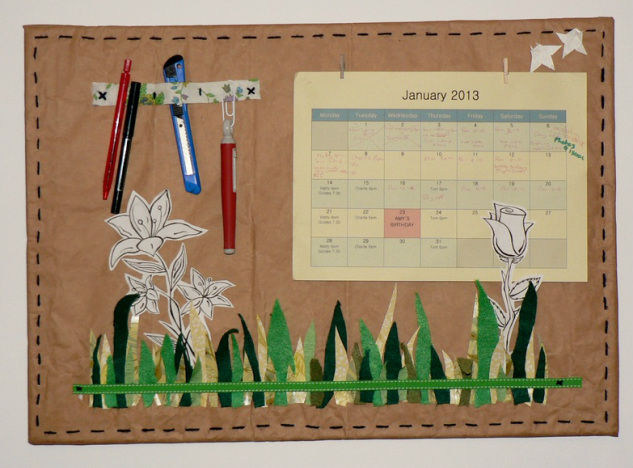
 I started with cheap art backing board, although I found afterwards that cork was just as cheap, I was nervous that stitching into cork would make it break up... | 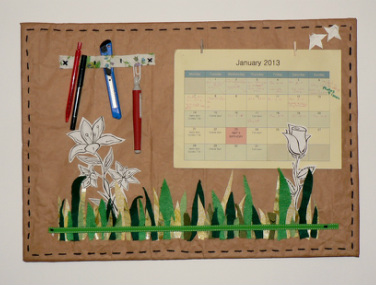 My finished notice board :) | After blue-tac-ing a print out calender to the wall two days ago I took a step back and thought "well that looks plain". Yesterday I took down the calender and looked to google for notice-board inspiration. I found some beautiful fabric notice boards, criss crossed with ribbon ( like this one).. and decided that none of them spoke to me as much as the old brown paper I had lying in the corner of my art room. So here is my mostly-paper-mixed-media notice board design! First I picked up a piece of backing board that would withstand a whole bunch of holes being made in it, covered it with some soft materials to round the edges and give pins something to grab onto, and wrapped it with my brown paper. These were all held on tight with clips while I sew them on using running stitch and some thick wool.
The layers were: Kitchen blue cloth, white textured wall paper, brown wrapping paper from a parcel I received previously. All these materials were lying around the room before I began - yay for re-purposing :)
After re-blue-tac-ing my calender on I thought - what else could this notice board need? A tool belt of course! I then stitched on a piece of flowery material I had lying around so that I had 3 handy compartments for tools on the left hand side. I also added little bits of origami and drawings I hadn't found a place for yet.
But it still looked so plain!
There was nothing for it but to go outside and take a long hard think about my design. Maybe some time in the garden would inspire the next step... the dew looks so beautiful on the lawn this time of year, and so I decided to create a mini lawn on my notice board, out of old scraps of felt and my 2012 calender of course. Oh, and the green crepe my brown bag had been held together using. Such cute packaging from etsy sellers, no?! First I cut out my lawn free hand and arranged the various leaves together to form a lawn, if you're trying this yourself, just persevere, my leaves looked nothing like grass on their own, it's all in the arrangement.  My mixed-media lawn After moving this onto the notice board I decided to glue down each leaf at the bottom, and then weighed it down with cups and rocks while I got on with another project... I quickly realised post-glue that PVA alone was not gonna hold felt to waxed paper, and stitched all the way along, making sure each leaf was stitched in. Finally I covered this stitching with some green ribbon I couldn't resist last time I went shopping... just to add to the overall green-ness. So here's my finished project. I love it, I'm imagining I'll use my mini clothes pegs to attach on what I would like to do in the garden, for my craft business, and more.. the possibilities are endless!
Before I moved on to decoupaging my drawers, I decided to start with something simple, like this picture frame I had ruined with marker, and turn it into a textured frame for an experiment I'd had with paper moulding last year. I'm really happy with the end effect, a simple frame perfect for a textured painting or something with bold colours... or both! 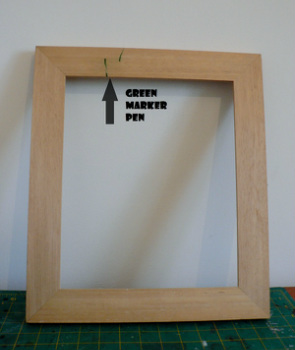 The frame before I began | 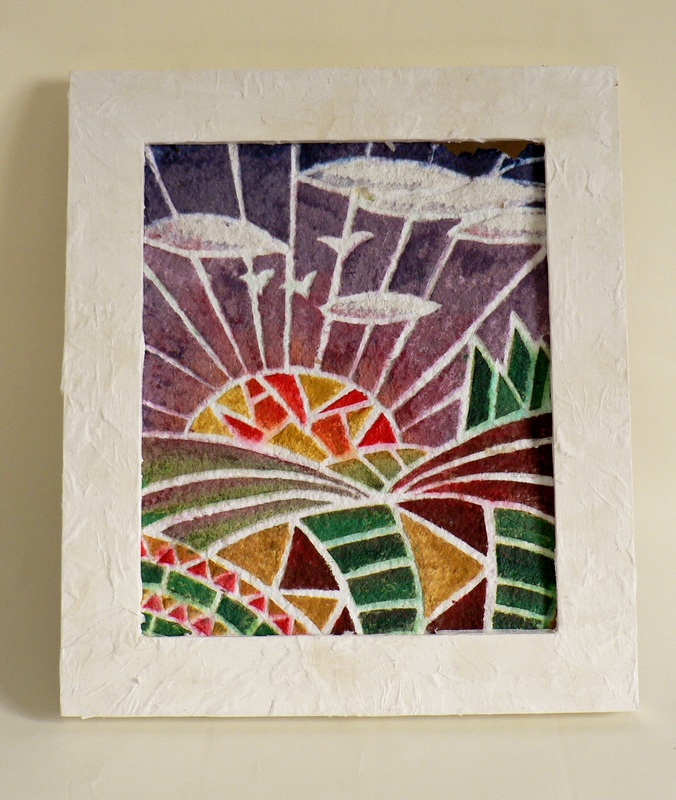 Finished frame with my "paper painting" inside | If you want to have a go yourself you're going to need: An old frame, white primer paint, tissue paper in your chosen colour(s), a paintbrush, PVA or other decoupage glue, a paint tray, and water to clean your brush with. Make sure the frame is super clean and then paint with at least 3 layers of primer, leave to dry.
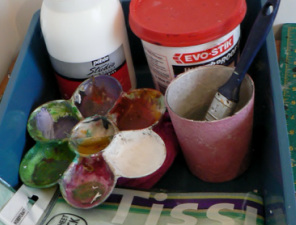 Supplies you'll need | 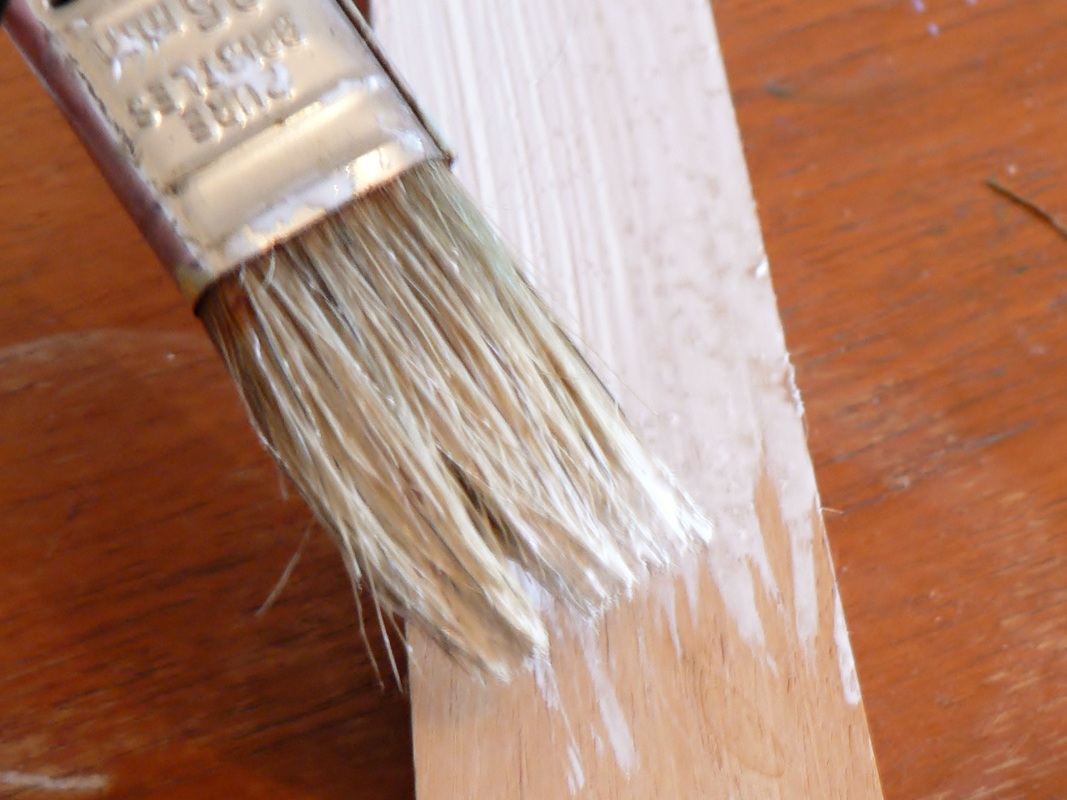 Paint the frame with thin coats of primer to ensure you get a lovely even coat | While your waiting for the paint to dry, select your tissue paper, tear (don't cut) into strips. Then, if you're like me, change your mind completely, change colour scheme, and tear up new tissue. I decided to go for all white and very textured to compliment the picture to go inside. The tissue I used was from a local non-profit organisation, http://www.cornwallscrapstore.co.uk/  After changing my mind on the colour scheme, this torn up paper will form the foundation of my decoration on the drawers Crumple the tissue paper and stick onto the frame using the glue underneath only. With most decoupage you're encouraged to glue over the top also, but I want a matt finish, so no top coat for me. I also scrunched some of the tissue after it was stuck on to encourage a textured finish. Once the tissue is completely dry you can go for a second layer wherever you think you need a bit more. Eventually you'll have the finished effect and can cut off the excess from round the edges. 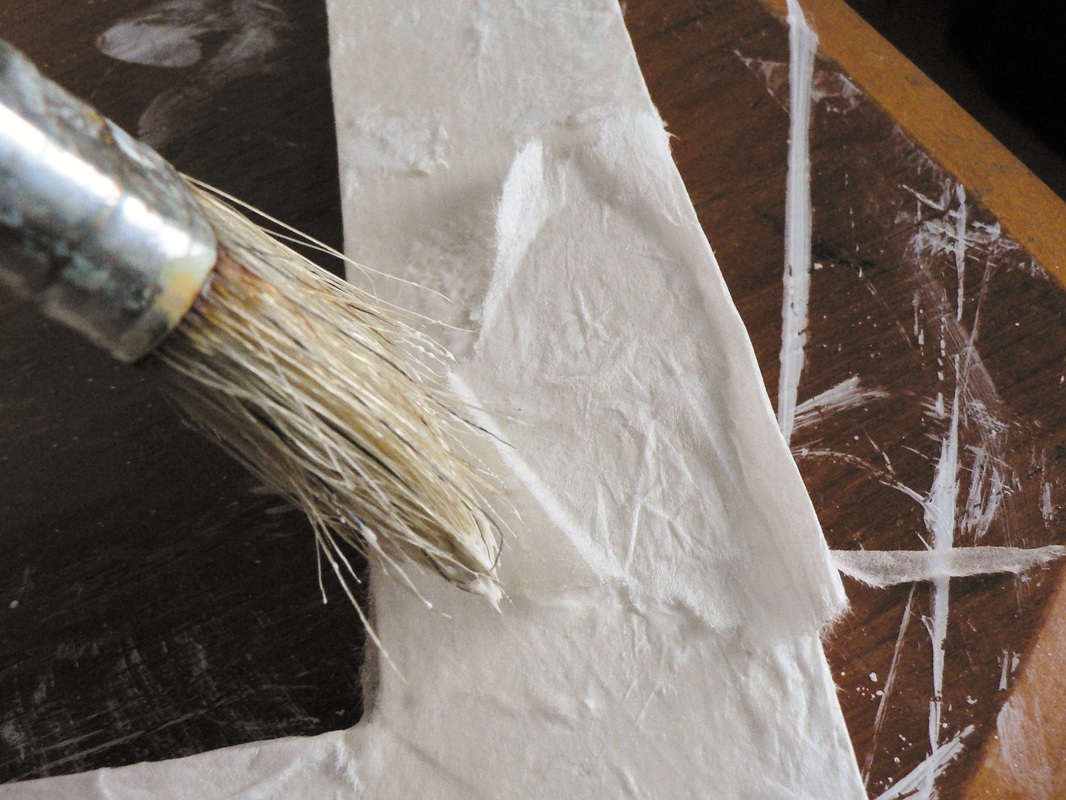 Stick on the tissue, you can use a dry brush to push the paper if you don't want to get your hands gluey | 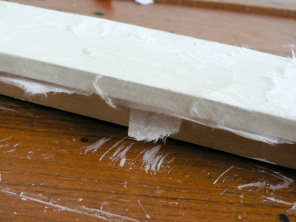 Find all the little flaps of spare tissue and cut the off, or tear very carefully! |  And you're done! Pop in the picture, I've left mine free of glass, so that the textures can be seen from every angle.
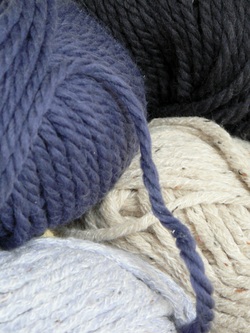 Colours are picked, I've gone for 2 Rowan Chunky Wool and 2 denim ultra yarns, same thickness. I think they'll work great for a blanket.
The colours work like this - beige (to represent overcast days), light blue (bit of sky), dark blue (lots of sky) and a dark grey (for when it's a storm and really raining).
I want to knit a square for each month, so I think I cast on 30 and knit 2 rows each day, but I'm almost a complete beginner having only knit one-colour scarves up to now. ARGH!
|

 RSS Feed